
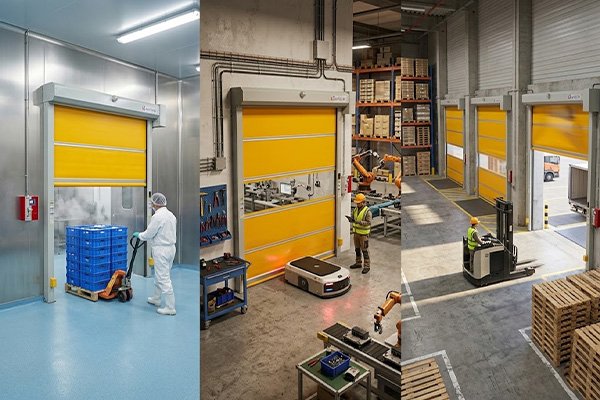
In modern industrial environments—from food processing plants to automotive warehouses—efficiency is the name of the game. High speed door installation is a critical step in optimizing workflow, maintaining temperature control, and ensuring site safety.
SEPPES, a world-class manufacturer of industrial doors, designs its products for durability and ease of use. However, the performance of a high-speed door is only as good as its installation. This guide provides a detailed, step-by-step walkthrough on how to install a SEPPES high-speed door correctly to ensure long-term reliability.
Why Proper High Speed Door Installation Matters
A high-speed door operates at velocities often exceeding 1.2m/s Because of this rapid movement, even a minor misalignment can lead to:
Excessive wear on the motor and drive system.
Damage to the PVC curtain or “self-repairing” zippers.
Safety hazards for personnel and forklifts.
Energy loss due to poor sealing.
By following the SEPPES installation protocol, you ensure your investment pays off through years of seamless operation.
Phase 1: Pre-Installation Preparation
Before you unbox your SEPPES door, preparation is paramount.
1. Site Inspection and Measurements
Verify that the door opening matches the dimensions specified in your order. Check the “headroom” (space above the opening) and “side room” (space on the left and right) to ensure the motor and tracks have sufficient clearance.
2. Required Tools and Equipment
Ensure your team has the following:
Laser level and measuring tape.
Power drill and a set of heavy-duty anchors (appropriate for the wall material: concrete, steel, or brick).
Allen wrenches and socket sets.
Ladders or a scissor lift.
Wiring tools for electrical connections.
3. Safety First
Always wear Personal Protective Equipment (PPE), including hard hats, gloves, and safety glasses. Ensure the area is cordoned off to prevent unauthorized traffic during the installation process.
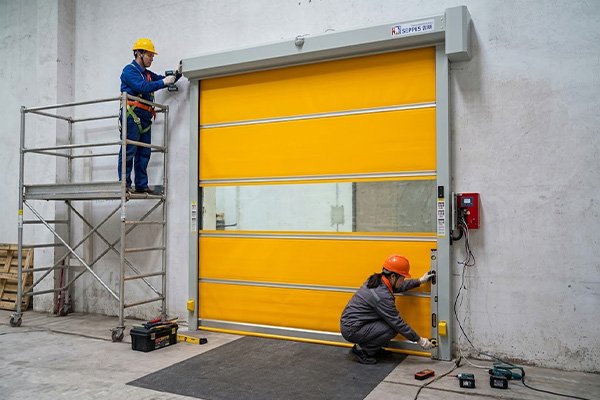
Phase 2: The Step-by-Step Installation Process
Step 1: Installing the Vertical Guide Rails
The guide rails (tracks) are the foundation of the door.
Positioning: Place the left and right guide rails against the wall.
Leveling: Use a laser level to ensure they are perfectly vertical (plumb). If the rails are uneven, the door will bind or fail to close properly.
Fixing: Secure the rails using the provided fasteners. For SEPPES doors, ensuring the distance between the two rails is consistent from top to bottom is crucial.
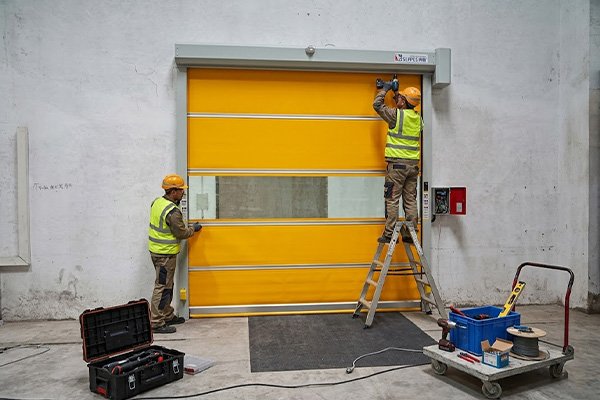
Step 2: Mounting the Header and Shaft Assembly
The header contains the roller tube and the motor drive system.
Lifting: This component is heavy. Use a lift to raise the header assembly and seat it onto the top of the guide rails.
Bolting: Secure the header to the rails and the wall brackets.
Alignment: Double-check that the shaft is perfectly horizontal. Even a 1°tilt can cause the curtain to roll up unevenly.
Step 3: Installing the Motor and Control Box
SEPPES doors typically use advanced G-Drive or similar high-performance motors.
Motor Mount: Attach the motor to the designated side of the shaft.
Control Box: Mount the control box at eye level (approx. 1.5m from the floor) on the side of the door for easy access.
Wiring: Connect the motor cables to the control box following the provided SEPPES wiring diagram.
Step 4: Hanging the PVC Curtain
Depending on the model, the curtain may come pre-rolled on the shaft or require manual threading.
Threading: Guide the edges of the curtain into the tracks. If it is a self-repairing door, ensure the “zipper” teeth are correctly aligned with the track’s inner guide.
Weighting: Ensure the bottom stress beam is balanced. This beam often contains the wireless safety edge sensor.
Step 5: Integrating Safety Sensors
Safety is a core feature of SEPPES doors.
Infrared Photocells: Install these at the bottom of the tracks (usually 20-30cm above the ground). These stop the door if an object breaks the beam.
Radar/Induction Loops: If your setup includes motion sensors, mount them above the door and calibrate their detection zone to avoid “false triggers” from cross-traffic.
Phase 3: Commissioning and Calibration
Once the hardware is in place, it’s time to “teach” the door its limits.
Manual Check: Before turning on the power, use the manual crank to move the door up and down. Check for any friction or unusual noises.
Limit Setting: Turn on the control box. Use the digital interface to set the Upper Limit (where the door stops when open) and the Lower Limit (where it seals against the floor).
Speed Adjustment: SEPPES controllers allow you to adjust the acceleration and deceleration ramps. Smooth starts and stops extend the life of the mechanical components.
Testing Safety Features: Trigger the photocells and the bottom safety edge while the door is closing. The door should immediately reverse to the fully open position.
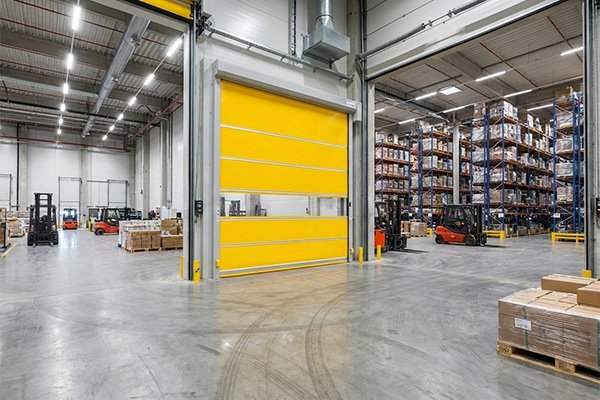
Maintenance for Long-Term Performance
To keep your SEPPES door running at peak efficiency after high speed door installation, follow this simple maintenance schedule:
Weekly: Clean the infrared sensors to prevent dust buildup.
Monthly: Inspect the curtain for tears and check the tracks for debris.
Quarterly: Check the tightness of all mounting bolts and inspect the motor for any signs of oil leakage.
Conclusion
A successful high speed door installation requires precision, the right tools, and a systematic approach. By choosing SEPPES, you are already halfway to a more efficient facility. Following these steps ensures that your door operates safely, reduces energy costs, and stands up to the rigors of high-traffic industrial use.
Are you looking for professional assistance or a quote on a new high-speed door? Contact a certified SEPPES technician today to ensure your installation is handled by the experts.
